Disclosure: As an Amazon Associate, I earn from qualifying purchases. This comes at no additional cost to you.
If you want to make a door snake, then a question may come to mind. The question is: what to fill homemade draft stoppers with? Is it possible to prepare no sew DIY draft stoppers?
To know the reliable answer to this question, you need to read this post where I have also shared some important notes and guidelines for you.
Some people also don’t know what is the function of this door snake. So read the full article to clear up your confusion.
What is a DIY Draft or Sound Stopper?
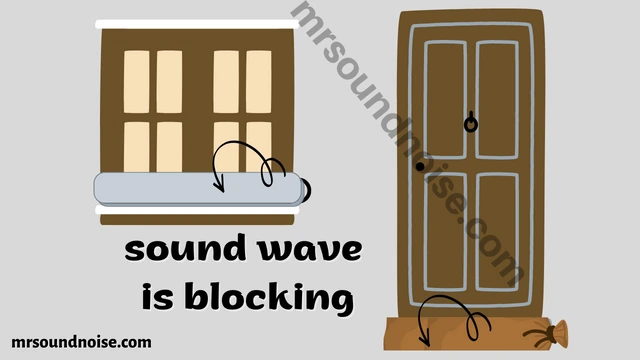
The other name is a draft blocker that can block the gap. That is why outside sound waves can’t come inside the room through this door snake.
You can also block the bottom window gap by using the window draft guard. For blocking the cold air, some people also make it at home and use cold drafts in the winter season.
Do DIY Door Snakes, Draft guards, or Draft Stoppers Work?
There are different types of stoppers. Automatic and lock door, homemade draft, rubber noise-proof stopper, etc.
According to their types, some activities of all these accessories are different. It depends on the activities of door weeping. For example, if you want to block that gap, then you should collect rubber and adhesive-type sound blockers.
If you need to permanently block that bottom gap, then you need a permanent lock-type stopper.
So you don’t need any confusion about the working function of this draft snake that is made at home. Most people are interested in using rubber-type sound blockers for easy maintenance.
What is a Soundproof DIY Sound Stopper?
The door sweep is a noise blocker that blocks the gap between the bottom door and the floor. Another way I can also say that stopper is a gap blocker that covers the gap between the threshold and the floor.
Now, the question that you may ask me is what is the difference between the DIY draft stopper and the soundproof door sweep?
When outside sound can’t enter the room through this sweep, then it is called a soundproof stopper. Now, you can understand that you are looking for this type of noise blocker for solving your room problem.
How to Make No Sew Double Door Draft Stoppers (DIY)
If you are bored and don’t have time to make door draft stopper (door sweep) then you can buy it from any good marketplace.
You can make it easy by using socks. For doing this, first, you need to fill those socks. Now, the question is that What to Fill that sock (Draft Stopper) with? how to make a vertical and horizontal DIY draft stopper?
You may keep rice, wheat, sand, acoustic fabric, scrap fabric, cotton batting, towel, or pool noodles inside that sock and make a DIY door draft stopper.
These things are the best filling materials for draft stoppers. After filling that sock, it turns into a heavy draft stopper. Finally, you need to tie the end part of that sock.
Remember: Sand-filled door draft stoppers are more reliable to most people. If you want to use a towel for that gap, then you should read this article: Does putting a towel under the door block sound?
There are many types of sound blockers in the marketplace. One is the self-adhesive stopper and the other is the lock blocker.
In this case, I will tell you that if you want to block the bottom gap with noise proof, then the effective choice will be the adhesive-type soundproof sweep.
On the other hand, if you just want to block the gap of the bottom frame, then you can collect the lock door stopper.
But it will be better if you choose an adhesive-type sound blocker. You can also install it instantly in an easy way. There is no need for any experience to install it for soundproofing.
Does the Adhesive-type Sound Stopper Need to be Sewn?
No, it doesn’t need any type of sewing (stitch), seam allowance, and sewing pattern. If you have any confusion about the activity of this pattern-free draft stopper, then you should read its detailed function.
Normally it has different parts. Such as the strip part, adhesive part, backing film part, chamber part, and panel part.
Now, I am describing these parts with a few notes.
1. Strip Part
The total part of this blocker is called the strip part. By cutting this strip part, you can easily prepare this blocker in length.
Adhesive part: In this part, there is strong glue included. This adhesive part helps this blocker to add strength.
2. Backing Film Part
This film part protects the adhesive area up to before installation of this blocker. This film part is on the adhesive area.
When starting the installation, you need to remove this film partly to open the adhesive area of the blocker.
3. Chamber Part
There are many air chambers included in this blocker. You already guessed that these chambers are filled with air. This air helps in protecting moisture, sound waves, etc.
4. Panel Part
There are multiple layers in this type of sound blocker. The function of these layers is the same as an air chamber.
These layers also directly stop sound waves, hot or warm air, cold air, water, insects, dust, etc. So these panel parts are the main part of this blocker.
Above all the parts are the basic parts of this type of sound blocker or DIY draught excluder that you can try to fix the gap with soundproofing.
What Can You Use at the Bottom Door Section?
Do you find an easy way to block the gap between the bottom door and the floor? Now you have to fix that gap. But in this situation, you don’t have any idea how to cover that gap for soundproofing.
You have already used a brush sweep to the bottom section. But sometimes, traffic and water heater noise comes into the inside room through this brush sweep.
Now you want to block that bottom gap with soundproofing. To find this solution, you have already searched on the internet. But you don’t find an easy solution to fix that problem.
Don’t worry.
I want to tell you that of course there is an easy solution for you that I have found by doing a lot of research.
Do you know about the DIY draft stopper tutorial? Yes, you can easily make that blocker and you can also find lots of blockers in the marketplace.
But the real condition is that you need to collect quality and sound blocker. For collecting it, you need to know the basic notes about quality blockers.
Besides, you need to fill all the gaps in the door by using easy methods. But if you want to know more about blockers, then you should read below the important notes that you need to collect.
If you have no idea about these sound blockers, then you don’t need to be upset about it. Here I will help you by giving some notes. So first you should know what a sound blocker is.
To install a self-adhesive blocker you should follow some easy steps. These steps are given below.
Step One
First you should collect a pencil, measurement tape, and cutter.
Step Two
Now select the best quality blocker from the internet. Remember, you should collect this blocker from the marketplace if you think about noise-proofing.
Step Three
Clean the bottom door area without water. Now measure the width of the bottom door section again.
Then open the sweep from the packet. Next cut the blocker according to the measurement. Normally there is no need to cut the length of this blocker because any sweep has a standard measurement.
Step Four
Now attach this draft blocker to the bottom door gap and make sure that it should touch the threshold. Now, mark the placement area with a pencil.
Step Five
Now, there is left final step to the final installation of the blocker. Remove the liner part from the adhesive area in the blocker. After removing that liner part, attach it to the pencil mark area.
Step Six
At last, check the bottom door section so that there is no gap there.
But there is an additional note for you. If you have installed a blocker, then you will be able to block that bottom gap.
But if you want to soundproof the other gaps, then you should install other soundproof accessories too.
If you want to learn more about it, then you can read the total guideline about soundproofing in any area.
DIY Draft Sound Blocker vs Under-Door Seal
Many of us are confused about DIY blockers and seals. Some people say that these blockers are the same and other people also say that they are not the same.
So which one is right? That’s your question too. A DIY sound stopper is a material part that blocks air, sound, water, insects, and dust.
Multiple layers are included in it for air and sound maintenance and you can easily remove it at any time if you feel.
On the other hand, the function of this seal is the same as the stopper. Multiple panels may not be included in that seal. Sometimes sound blockers are called seals.
The real fact is that nowadays DIY sound stopper and seal are the same terms. But the adhesive-type sound stopper is becoming popular day by day.
This is the reason why, if you collect this sweep, then you will automatically complete all the steps.
My Viewpoint
In the summary section, I just want to tell you that you can use any noise-reduction blocker. You should not have any confusion about it.
You should use the other noise reduction accessories for full noise proof. Such as you can use weather stripping, acoustic sealant, and acoustic curtain to block noise waves.
One thing that I want to remember is that you should clean the door when necessary. In this situation, you don’t need to worry about uninstalling the sound blocker.
If you want to replace this blocker, you can easily remove it. In bad weather conditions, it will have no impact, if you install this sound blocker.
After doing all these things, now you should focus on soundproofing your room window. So read the guideline about soundproof windows with quick steps.
Finally after checking all these noise reduction accessories, if you face any problem in the room, then my suggestion is that you should also check the overall guideline about soundproofing a complete room with effective solutions.
Finally, one more thing that I want to tell you is that if you are interested in this topic and want to learn more, then you can read the questions that are in the FAQ section.
FAQ: No Sew DIY Draft Stopper
Is the Automatic DIY Sound Stopper Soundproof?
Which one is better among homemade, automatic, and adhesive-type sound blockers? To understand this question, you should read this logic.
An automatic sound blocker has the function of an automatic on-and-off system. When you open the door, then normally this blocker may turn open.
When you close the door, this blocker may turn too close. So this blocker is not protecting the door for all time.
Insects, dust, air, and noise may enter, by using it. Homemade stoppers also work in reducing noise.
On the other hand, adhesive-type sound blockers protect the door for all time. There are available multi plates that control air and sound 24 hours!
Besides, no insects, dust, or water can’t enter the room through this blocker. The good news is that you can easily use it for a soundproof setting.
How High Should a DIY Sound Stopper be from the Floor?
After installing it, you should keep alert to cover the gap for soundproofing. If you keep any gap, then outside air and noise will enter the bedroom and make your room noisy.
After the installation of this blocker, there is no problem opening and closing the door.
Will a No-sew Sound Stopper Keep Bugs Out?
When you install it, the end part of it touches the floor ground. After opening the door, that blocker also touches the ground.
This is a good facility for using adhesive-type sound blockers. In this situation, dust can’t enter the room.
You know that if there is no way for dust to enter the room, then automatically any kind of bugs also can’t enter the room.
Do No Sew Sound Stoppers to Keep Mice Out?
There is no gap available after installing it. Even when you open and close the door, there is no gap created below the bottom side. Now I think you can understand why mice can’t enter the house.
Can No Sew Sound Stopper Keep My Door Soundproof?
After doing the installation process of the DIY sound blocker, now you should check the other part of it.
Here, the question is, what side should I check to keep it soundproof? To answer this question, now I am writing some notes that you should read to get the answer to this question.
First, check carefully the holes or cracks. If you find some cracks or holes, then you need to take action to fill those cracks. Otherwise outside sound may enter your room through these holes.
After finding these holes, now you should decide to fill those holes anyhow. So in this situation, you should use acoustic sealant to block those holes and cracks.
After applying the sealant, now you should concentrate to seal the door side joint. If you don’t pay any attention, then any outside sound can also enter through this joint.
To seal this side joint, you should use door weather stripping in that situation. If you want to get more guidelines, then you can read more noise-proofing instant guidelines.
After doing all these things, the installation of all the soundproofing accessories is done. It will be better if you install an acoustic curtain or blanket in this area.
Do No Sew Sound Stoppers Last for a Long Time?
If you make this type of blocker with socks, it will last a few months. Rubber-type sound stoppers last for a long time.
Because rubber material has no chemical change. On the other hand, if you use metal sound stoppers, there may be erosion after a long time.
You know that erosion happens when air, water, and metal contact each other for a long time. In the case of plastic material, there is no erosion.
This is the reason why rubber-type sweeps last for a long time. Besides, you can easily replace this rubber-type blocker and the good news is that it is very cheap.
Is Homemade (DIY) Sound Stopper Harmful to Humans?
This is also a good question because you need to use these blockers in the household area. Normally these blockers of plastic material may not harm people.
Metal-type blockers may not also have any impact on the human body. But there may be some problems when you burn plastic-type blockers.
During the burning of plastic material, there is smoke that is harmful to the human body. So you should keep away plastic material from fire.


 from Noisy Neighbours: 9 Tips")

