Disclosure: As an Amazon Associate, I earn from qualifying purchases. This comes at no additional cost to you.
Do you want a soundproof ceiling in an apartment, condo, or flats? But don’t find any perfect solution to soundproof your ceiling?
Don’t worry.
You can find the required information about the silent ceiling.
Are you facing the noise that comes through the ceiling from upstairs neighbors on the top floor in an apartment building?
Here I will tell you that there is also a solution if you follow some practical steps that I will suggest to you step by step. But before that, you should know some important points for proper soundproof ceiling technique.
I will also give you special important notes that are really required of you for real implementation. So keep on reading about soundproof ceiling guides.
Do you know that noise can be of different types? Yes, they can be classified as a condition. Here, you should know the different types of noise, if you can justify the noise and you should remove it.
Noise can be categorized into two types. Such as airborne noise (airborne sound) and structure-borne noise.
You can solve air-borne noise by applying soundproofing material. Ceiling noise and floor noise include structure-borne noises (impact noises).
You need to soundproof the noise of the footsteps that comes from the ceiling(upstairs). To solve that noise you should maintain some technical terms.
For stopping structural noise, I will discuss how to soundproof the ceiling but if you are interested in solving the floor sound problem (impact noise) then you should read about floor soundproofing.
You know that the ceiling is constructed with various materials. Such as brick, cement, wood material, etc.
However, you need to focus on the weak point of the roofing area and make a list in a handbook for a solution.
You know that structure-borne noise can be created by the footsteps of any other person who lives on the top floor of your room. On the other hand, on the floor of your room, that noise can be created in the same way.
Even, you are facing some high volume music noise that comes through the roofing area from the top floor. Then you feel bored and think about how to survive from the irritating noise that comes from the top floor or nearest neighbor.
In that situation, you cannot ask that person to stop loud music for sympathy but mentally you want to stop that loud sound.
In this situation, the best solution is to fix the roofing area of your room so that the high-volume sound of the top floor cannot pass through the ceiling to your room.
For that, you should soundproof that area in a proper method. You can soundproof this section by using drywalls, acoustic foam, soundproofing padding, the material of fiberglass insulation, and resilient channels by following an accurate method.
So you should know-how and in what condition you implement these soundproof accessories.
You don’t need to worry about soundproofing a ceiling because it is not tough to do it. So I will try to share my final findings. If you can follow these notes, then you will get better results in a short way.
So now I am telling you some suggestions that you need most to solve that problem.
How to Reduce Impact Noise from Upstairs Neighbors (Floors)
In the soundproofing of the ceiling section, you should focus on the solution of structure-borne noise. Besides, in some cases, you should also work for the solution of airborne sounds to the ceiling arrangement.
1. Repair of Ceiling Gaps or Cracks by Crack Filler
First, you should fill all cracks or gaps of the ceiling surface. You should use acoustic sealant to fill these gaps or cracks because it will stop all gaps/cracks with soundproofing.
You can find all the cracks in the roofing area if you focus on this section with more concentration.
Especially notice the joint side where the electric cable, fan, and instruments are transferred through the ceiling. You will find some cracks with the help of light.
Thus you will find all the holes, noise leaks, and gaps in this section. You know that air can pass through these ceiling holes.
So I can tell you that, noise from the top floor can enter your room through these holes. Take more time to find gaps. If you miss one gap, then the total installation can be failed.
This is the reason why you should focus on this point. In the marketplace, you will find sealant to fill these cracks.
An acoustic sealant is also waterproof. This acoustic sealing will adjust the ceiling hole tightly. You can use green glue sealant (crack filler) because it is popular now. Besides, you can also use another sealant for implementation.
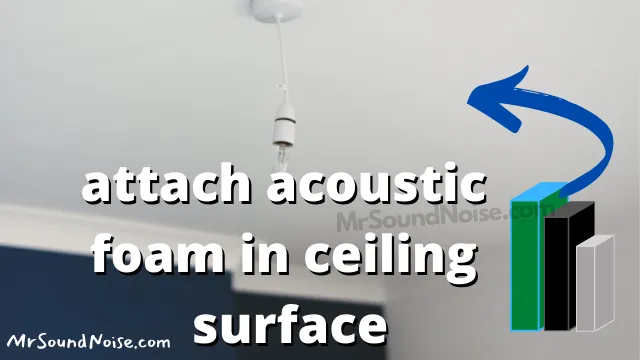
2. Arrange Acoustic Foam in the Ceiling
After filling cracks in the ceiling, now you should focus on the next step. Yes, the next step is to arrange absorbent material (acoustic foam) for soundproof.
So continue reading to know the next step. Do you know about the material that can absorb around 100% sound waves? There is good news to you that there is found a material that can absorb up to 95% sound waves.
I think you can understand what material that I want to tell you. Yes, your guess is right. I am talking about acoustic and soundproof insulation panels that have a 0.95 NRC rating.
Do you know what NRC means? 0.95 NRC means acoustic foam can absorb up to 95% noise at any condition.
So the use of acoustic foam panels can be a better solution to soundproof ceilings without construction. This foam is available in various shapes.
You can use any shape of acoustic foam as your own choice. The most preferable is to use tile shapes of acoustic panels for the reduction or soundproofing of impact noise from the ceiling.
There is good news for you about this foam panel. This acoustic panel is also available in different colors. You can decorate the roof section with colorful foam panels.
If you have any doubt about this foam, then you can read this data to know more updates. You can add an acoustic panel with the help of spray adhesive glue that you will find from any marketplace.
Before using this foam, you should know the ceiling perimeter (measurements) for proper setting. This foam is used in different locations for soundproofing. For example, you can use this foam on the room wall for soundproofing.
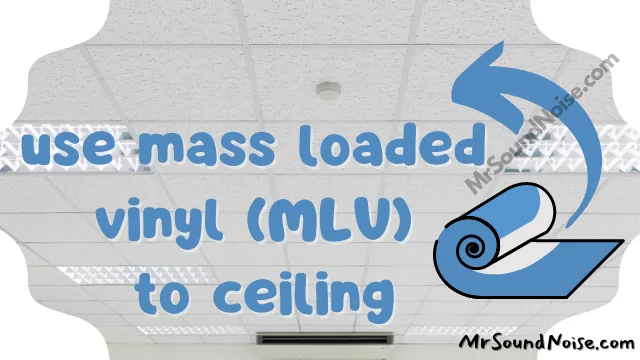
3. Use MLV to the Ceiling
MLV is also effective for soundproof ceiling areas.
So, first, you should know about MLV. Most people know this term because they also implement it in the floor section.
If you are interested in it, then you can read this article about how to soundproof a floor. Now, come to the point about using MLV in the apartment ceiling section.
MLV is mass-loaded vinyl that has the high capacity to stop noise transfer of your room. Because it is used to increase the width density of the ceiling layer of a room.
This is the reason why any sound from the other floor cannot cross that layer. You should know that noise can pass through the air and solid material.
There is available one kind of material which can stop noise transmission. The name of that material is high-density acoustic material.
This material is included in MLV. Now, you can understand why it is important to block sound waves in the roofing section.
You can cover that area with MLV. After setting it with no gap, it acts as an extra layer in this section. Before collecting MLV, of course, take the total measurement of the ceiling area.
This measurement will help you to collect the actual size of MLV that you need most. The good news about MLV is that you can cut it at any size.
So you can use it in this roofing area as your requirement. Normally, people use black color MLV but you can collect the other color from the marketplace.
Here, my suggestion is that if you can use both MLV and acoustic foam, then you will get the double facility from those accessories. You can set those accessories as your own choice on the ceiling surface.
You can also install this MLV on the floor for more soundproofing.
4. Use Drywall in the Ceiling
Drywall is one kind of layer (panel) that is also used in the roofing area for soundproofing. Definitely using this layer of ceiling drywall is a smart way to soundproof.
But there are easy rules to use. There is no problem using soundproof engineered drywalls without the resilient channel.
But you can get a double facility if you set up regular drywall with the resilient channel. When the sound source is near the drywall which creates vibrations, then this channel stops that sound vibrations and blocks sound.
Now you can ask me a question. What is a resilient channel? Well, the resilient channel is a long and thin metal part that blocks the unwanted noise passing to the air.
It is implemented in the ceiling joists with soundproof clips. These resilient clips also play an important role in soundproofing settings. You can get it in the marketplace.
Drywall increases the ceiling layer with soundproof and you can also increase layers by using double layer drywall. This is the reason why sound from the top floor cannot pass this layer.
You can use conventional drywall for soundproofing a ceiling. But you cannot get the best result from conventional drywall. So the best way to get the best result is to use soundproof drywall that has more than an STC rating of 50.
Now you can also ask me what STC is. STC means sound transmission class and STC 50 means a material that can stop 50% sound in any condition.
Now I want to tell the function of the resilient channel with a small brief. When you attach one part of the resilient channel in the ceiling frame, then the other part of the resilient channel will remain open.
When any sound has come to this resilient channel, the sound is floating in the open part of the resilient channel. Thus any sound loses its transmission power gradually.
Now when you set drywall with the resilient channel, then there remains about a half-inch gap between the resilient channel and drywall. When the noise that is floating in the resilient channel, comes to the air gap and loses more transmission power.
Finally, drywall can block that sound that has already lost its transmission power. Thus resilient channels block any noise that comes through them.
Hope you understand the total basic function of the resilient channel. There is also good news for you. You can use drywall to your room wall to remove outside noise.
The setup system of this drywall is the same. But you need to take wall measurements before setting drywall to your room wall.
5. Use Soundproof Paint in the Ceiling
Do you believe that only any color can stop the transfer of noise? I think you are not thinking that only color can stop a sound wave.
In our developed world, anything may happen. Any normal color cannot block a sound wave but only acoustic paint can reduce some sound waves of the noise source.
This concept is also a reliable concept and our technology helps to grow this acoustic paint concept. Also, this painting is easier than other processes.
Just unpack the packet and start painting. That’s all. People also call it by other names. Such as sound-insulated paint or sound dampening paint or sound deadening paint.
This acoustic paint is a thick layer than other normal paints. This is why thick paint creates a heavier layer than other layers of conventional color.
This acoustic paint includes sound-absorbing fillers. You should know that this type of acoustic paint is able to stop low-frequency levels of sound.
You cannot get a good result if you just paint acoustic color in the ceiling without installing other soundproof accessories. Because in this section, there may be a higher level of sound.
If you create multiple layers with normal paint then these multiple layers are not effective to block any sound. On the other hand, just one layer of acoustic paint will be able to block low-level sound waves.
The system of acoustic painting is totally different from other normal paintings. The reason is that the density of the normal paint is low. On the other hand, the density of acoustic paint is higher. So the color spread area is low in the acoustic paint.
This acoustic paint needs a long time to dry. You should wait almost 32 hours before doing the second layer of it. More layers of this acoustic paint will be more effective to reduce noise. Normally it is recommended to have at least three layers.
When you apply acoustic paint, make sure to paint the full area that you need to soundproof. You should paint all the gaps or holes in your selected location.
Don’t do paint in half part. Do acoustic paint with your selected full area. You can use a roller or pressure sprayer to paint acoustic colors.
If you have a budget problem, then you can only use a simple roller to paint. You can use this paint on your room wall too.
If you are tired of applying all these accessories above then you can use specific earmuffs for instant noise reduction.
Actually, if you want to achieve a great result for soundproofing a ceiling, then you must follow the special sequence that is given below.
Please read these sequences with concentration.
Get the Best Result to Soundproof an Existing Ceiling
If you want to get better facilities, then you need to read these sequences and apply them properly.
Sequence One: In the first step you should find all cracks properly. After finding cracks at first fill all cracks with acoustic sealant and give this adhesive material some time to dry.
Sequence Two: Then you should find a way to keep the acoustic foam one by one in the ceiling frames (metal or wooden studs). Before loading acoustic foam in this section, take an accurate measurement with tape.
Then load all the ceiling area with acoustic foam. You can load any fiberglass material if you don’t use acoustic foam material. What material you want to use is your choice.
However, make sure that you must use acoustic foam or fiberglass material. If any adhesive is needed, use any type of glue that you can find in the marketplace.
Sequence Three: if you want to set up an MLV, then set it in the surface section of the ceiling part. By setting up MLV, it increases the layer for more soundproofing.
You know that MLV is a great soundproof material and it will absorb high-volume sound that comes from anywhere. The measurement of MLV will be the same as you did it before in the setting of acoustic foam.
As the measurement of the ceiling, you should collect soundproof MLV from the marketplace. If there is any gap, then you can cut any portion of MLV and add to the gap for full closure of this section and you can use the screw to tighten MLV.
Sequence Four: You should set up a resilient channel in the ceiling frame because, with this resilient channel, you should attach drywall. The resilient channel keeps some gaps that are required for stopping any level of sound.
Sequence Five: After setting the resilient channel, add drywall with the resilient channel so that the drywall can strongly adjust to the ceiling.
After adding drywall, the thickness of the ceiling layer will be very high. Remember, drywall is also important to stop the sound that is passed through a resilient channel.
Sequence Six: Finally you should cover the total ceiling with acoustic paint. You can make your choice as your preferred color for decoration of this roof area.
Scientifically any high volume sound will decrease step by step when that sound passes through this roofing area that you have already prepared for soundproofing with required guidelines.
If you can follow the above sequence then you can get the best result to soundproof a ceiling.
My Final Thought About Soundproof Ceiling
You should take a long time to make a proper decision to soundproof a ceiling. If you read above all the suggestions and try to implement them properly, then you can succeed in soundproofing a ceiling.
There are two most important matters that are especially needed for you for actual soundproofing in your room. Yes, these actual matters are your concentration and patience.
If you have the owner of these two, then success will knock on your door quickly. I know that noise that comes from the top floor is a crucial problem that you really need to solve anyhow.
Otherwise, you want to look for a permanent solution. You can use above all suggestions and make implementation for a solution.
So take serious steps for the installation of soundproofing elements. If you want to soundproof your room properly, then there needs to be some more work for you.
You should soundproof your wall carefully. To fix your room wall, you need to fix the room window and door.
So here you also implement some steps in your room window. For this, you need to read the full article about soundproofing a window.
On the other hand, you also do some special tasks for your room door. So you need to learn about soundproofing a door properly.
Here you also focus on the floor, if you want to soundproof your entire room. If you do accurate work for fixing doors, windows, and floors, then you can set up your room for keeping silent.
It is required to follow the sequence that I have told you above. I just told you to follow those sequences for better results. Otherwise, you can set any soundproof accessories as your own choice.
Besides, if you think that you can set up your room for keeping silent by using selected soundproof accessories, then you can try.
There is no obligation for you. You can use any soundproof accessories as your own setting.
FAQ: Soundproof Ceiling
Does Soundproofing of a Ceiling Section Really Work?
This system works, if you are able to set up the guidelines. Besides, at first, you need to check the main weakness of the ceiling section. If you have any interest to know more about soundproofing that works or not, you must read that topic.
Then start to fix that part after reading the detailed guidelines of the implementation of acoustic material.
Can You Soundproof an Existing Ceiling Section Alone?
It will be better if you take help from others. Because if you want to set drywall in the ceiling section, then you can’t install it alone.
Why can I Hear My Neighbors Footsteps from the Ceiling?
The reason is impact noise and this sound flows through the weak point of the ceiling section. If you are able to fix the weak point, then you may be able to stop that noise.


 from Noisy Neighbours: 9 Tips")
 from Noisy Neighbours: 9 Tips")


